windesheim-iac
Setup ESXi Hypervisor
- In Skylab request a new ESXi hypervisor with 4 cores and 16 gb of RAM.

- Add a new dish with 50 gb of storage.

Note
The hypervisor does not accept SSH connections yet, or incoming connections from the VPN Network.
- Connect to the remote console of the ESXi hypervisor.
- Press F2 to login.
- Navigate to
Troubleshooting Options→Enable SSH. - Restart Management Agents (under "Restart Management Network").
- From within a reachable VM on the VPN Network, SSH into the ESXi Hypervisor. (e.g. first SSH into
192.168.1.10, then from that session SSH into192.168.1.5)- Enable incoming trafic from the VPN subnet:
esxcli network ip route ipv4 add --gateway=192.168.1.1 --network=10.0.0.0/24 - Enable this on startup:
vi /etc/rc.local.d/local.sh- Add just before the final
exit 0line:esxcli network ip route ipv4 add --gateway=192.168.1.1 --network=10.0.0.0/24
- Enable incoming trafic from the VPN subnet:
Now you can access the ESXi dashboard on 192.168.1.5 (or whatever the ip of the hypervisor is).
- Add a new datastore:

Setup Linux Development Environment
-
In Skylab request a new Ubuntu Server 24.04 machine.
-
Enable network access:
- Gain access to the terminal in the new machine (similar to step 4.0 from the ESXi setup)
- Edit the
/etc/netplan/99-netcfg-vmware.yamlfile to contain routes and nameservers:
network:
version: 2
renderer: networkd
ethernets:
    ens192:
    dhcp4: no
    dhcp6: no
    addresses:
        - 192.168.1.6/24
    routes:
        - to: default
          via: 192.168.1.1
    nameservers:
        addresses:
        - 192.168.1.1
sudo netplan apply
-
SSH Access:
- Generate 3 SSH key pairs
ssh-keygen -t ed25519 -f ~/.ssh/devhostssh-keygen -t ed25519 -f ~/.ssh/skylabssh-keygen -t ed25519 -f ~/.ssh/azure
cat ~/.ssh/devhost.pub >> ~/.ssh/authorized_keyschmod 400 authorized_keys
- Generate 3 SSH key pairs
-
Copy the keys
- Copy the content of devhost to a file on your local machine:
scp student@192.168.1.6:/home/student/.ssh/devhost D:/School/devhost - Set the permissions of that file with Powershell as admin:
icacls "D:\School\devhost" /inheritance:ricacls "D:\School\devhost" /grant:r "$($env:USERNAME):(R)"
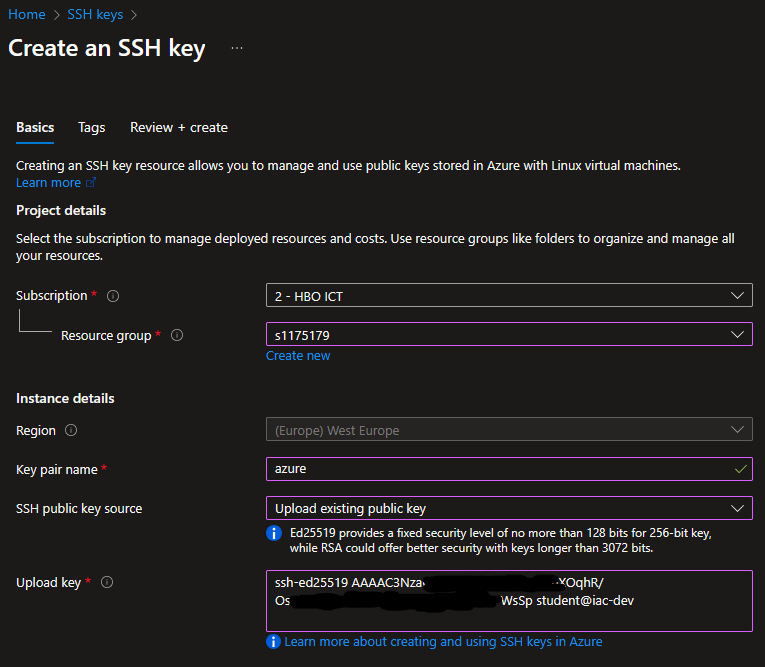
- Upload the
azurepublic key to Azure:
- Copy the content of devhost to a file on your local machine:
-
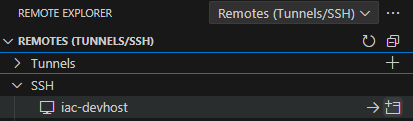
Now you can access the VM via VSCode:
- Install the Remote Explorer extension.
- Add this to your ssh config:
Host iac-devhost Hostname 192.168.1.6 User student IdentityFile D:/School/devhost- Connect to the machine in VSCode:
-
Install deps:
sudo apt install git unzip curl sshpass -
Install OVFTool
wget https://github.com/rgl/ovftool-binaries/raw/main/archive/VMware-ovftool-4.6.3-24031167-lin.x86_64.zipunzip VMware-ovftool-4.6.3-24031167-lin.x86_64.zipsudo mv ovftool vmware-ovftoolsudo mv vmware-ovftool /usr/bin/sudo chmod +x /usr/bin/vmware-ovftool/ovftool.binsudo chmod +x /usr/bin/vmware-ovftool/ovftoolsed -i '$ a\PATH=$PATH:/home/student/.local/bin:/usr/bin/vmware-ovftool' ~/.bashrc
-
Install PIP and Ansible
sudo apt-get update && sudo apt-get install -y gnupg software-properties-common python3-pip pipxpipx ensurepathpipx install --include-deps ansiblepipx install ansible-lint
-
Install Terraform
-
wget -O- https://apt.releases.hashicorp.com/gpg | gpg --dearmor | sudo tee /usr/share/keyrings/hashicorp-archive-keyring.gpg -
echo "deb [signed-by=/usr/share/keyrings/hashicorp-archive-keyring.gpg] https://apt.releases.hashicorp.com $(lsb_release -cs) main" | sudo tee /etc/apt/sources.list.d/hashicorp.list -
sudo apt-get update && sudo apt-get install terraform -
Install Azure CLI
-
curl -sL https://aka.ms/InstallAzureCLIDeb | sudo bash -
Login with
az login -
Choose the
2 - HBO ICTsubscription


Test Connection
Run the following command and enter the password of the root user on the ESXi Hypervisor: ansible -i '192.168.1.5,' -m ping all -u root -k
This will return a success message:
